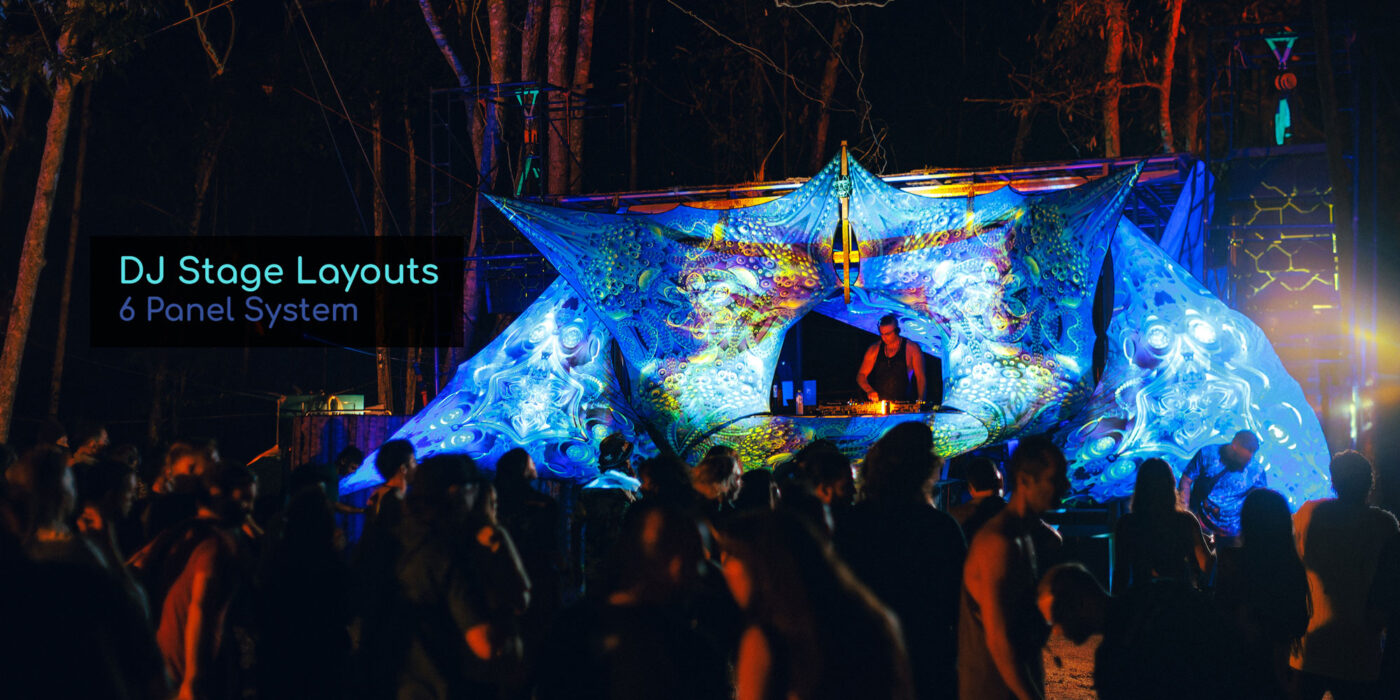
Layouts Library
How to design a DJ stage with 6 panels (5 layout ideas)
Apr
Intro
Designing a DJ stage is not just about visuals — it’s about how the structure works in a real space.
In this post, we break down 5 practical DJ stage layouts built using a 6-panel (triangle) system. Each configuration is designed to be easy to install, adaptable to different venues, and strong enough visually to anchor a dancefloor.
These layouts can be used as-is or adjusted depending on your setup — from compact indoor stages to wider open environments.
How to read these layouts
- Darker triangles = front layer
- Lighter triangles = positioned in the back
- Pink points = key anchor points (these need to be tied/stretched for the structure to hold shape)
- White circles = additional loops you can pull forward or backward to introduce depth
All layouts are shown in 2D, but in practice:
→ pulling selected points forward/backward is what creates a true 3D stage
Also:
→ back triangles can be lowered if needed, depending on your space and rigging options
Layout 1 — Compact enclosed stage (TR-ST-001)
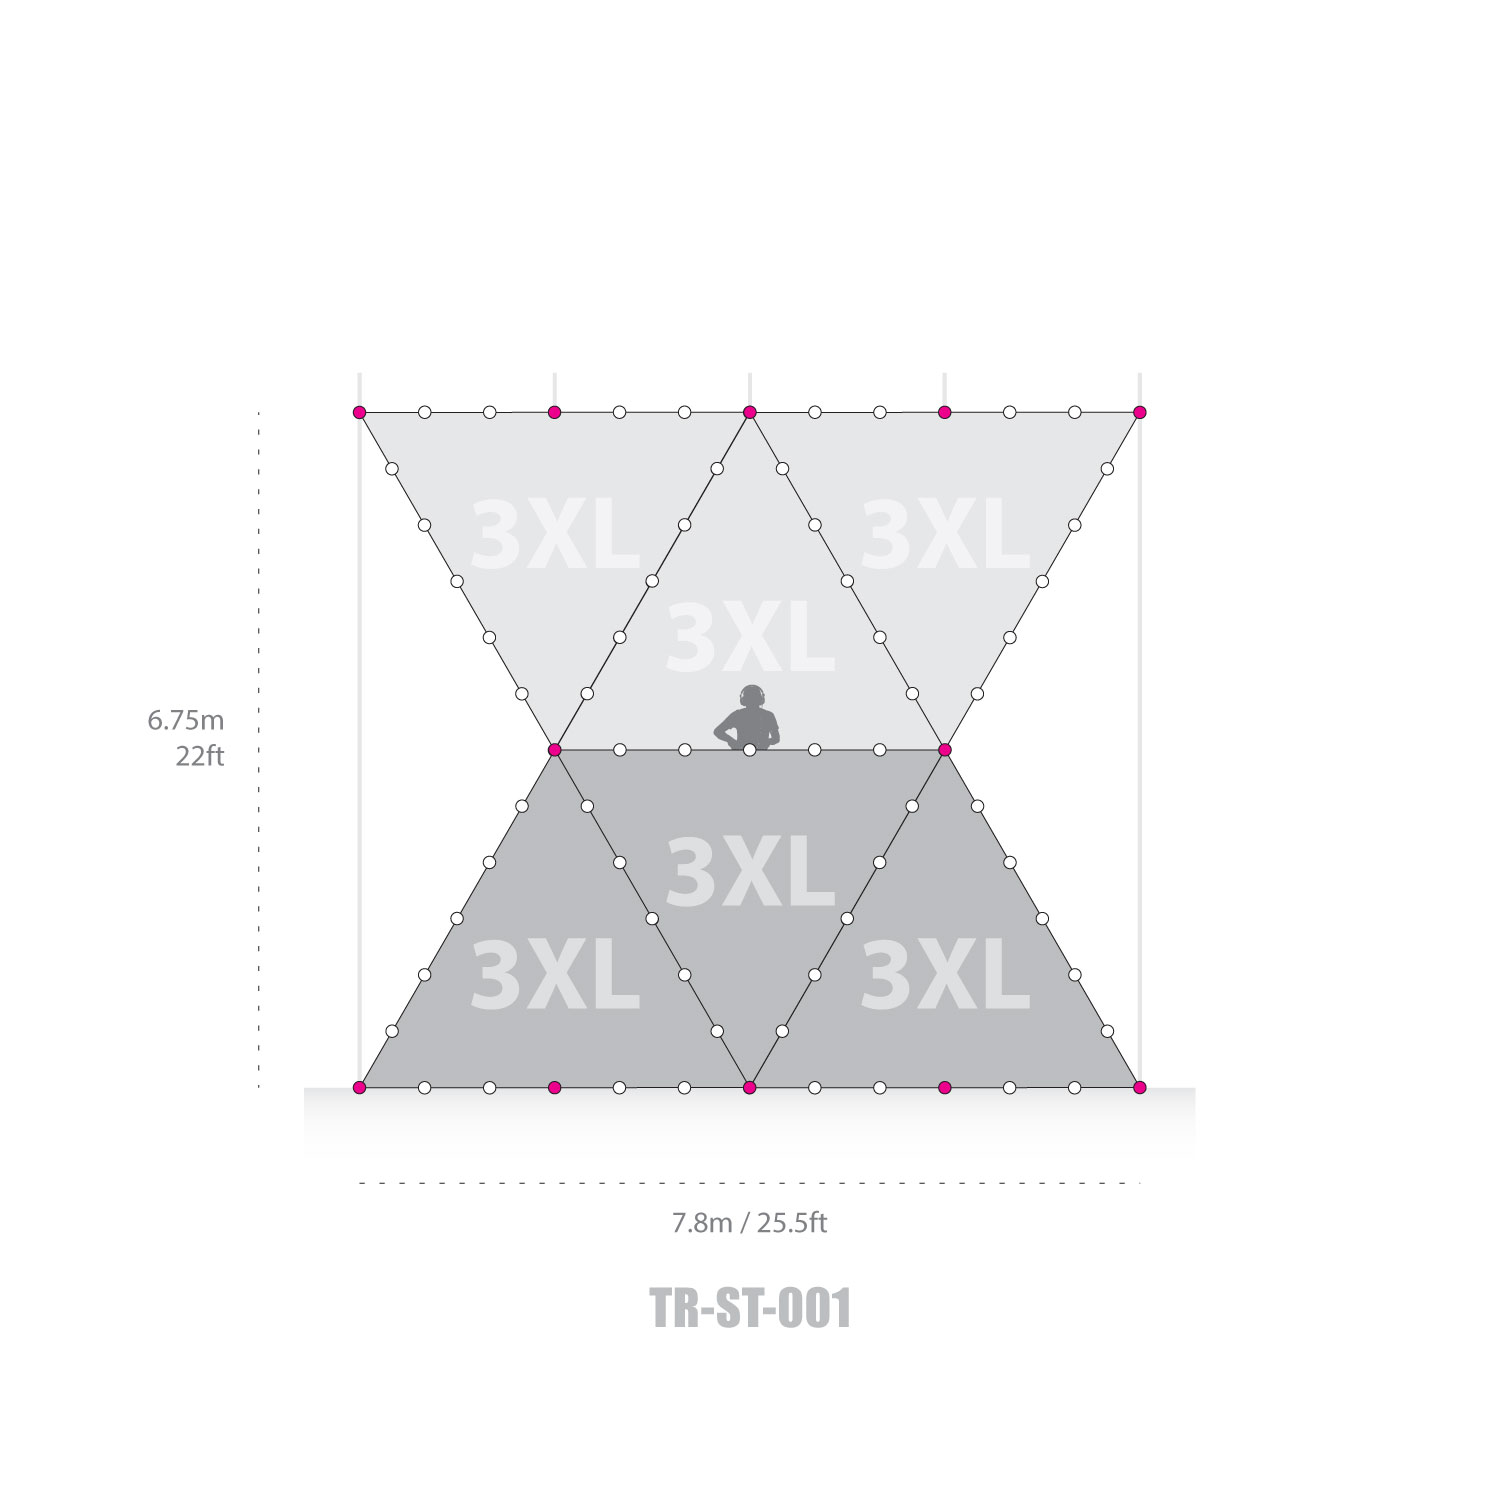
What’s happening:
- Tight, symmetrical structure
- DJ positioned slightly recessed
- Clear front/back layering
Why it works:
- Strong visual anchor
- Works well in smaller indoor venues
- Easy to light and map
Use this if:
You want a controlled, intimate dancefloor with clear focus on the DJ.
Layout 2 — Wide open stage (TR-ST-002)

What’s happening:
- Extended horizontal spread
- Symmetrical expansion left and right
- More open edges
Why it works:
- Covers larger stages
- Better visibility from distance
- Feels more “festival scale”
Use this if:
You’re working with a wide stage or expect a larger crowd.
Layout 3 — Expanded symmetrical geometry (TR-ST-003)
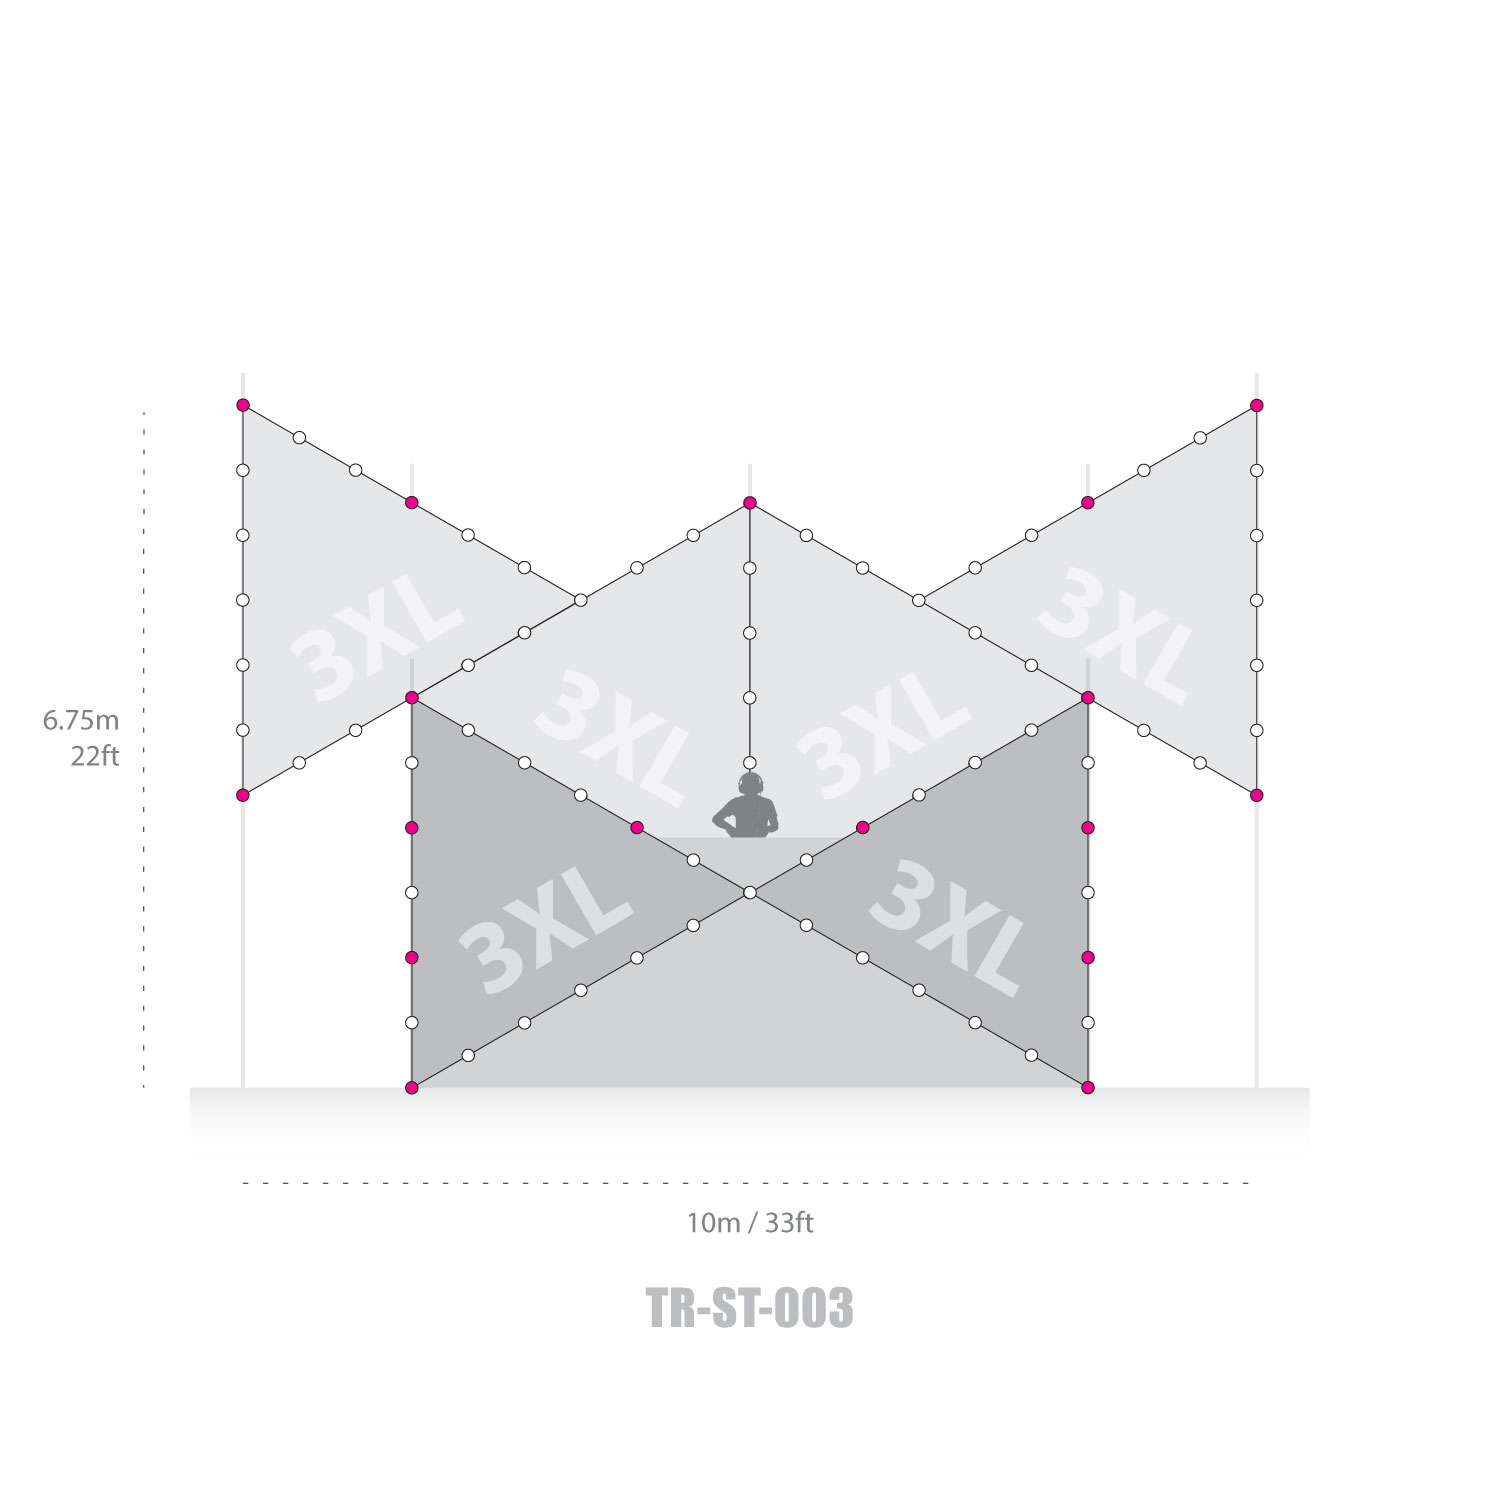
What’s happening:
- Symmetrical layout with extended outer triangles
- More breathing space between elements
Why it works:
- Keeps structure balanced while feeling more open
- Allows more freedom for lighting and visuals
- Strong presence without being too dense
Use this if:
You want a balanced setup that doesn’t feel too compact or too stretched.
Layout 4 — Elevated center focus (TR-ST-004)
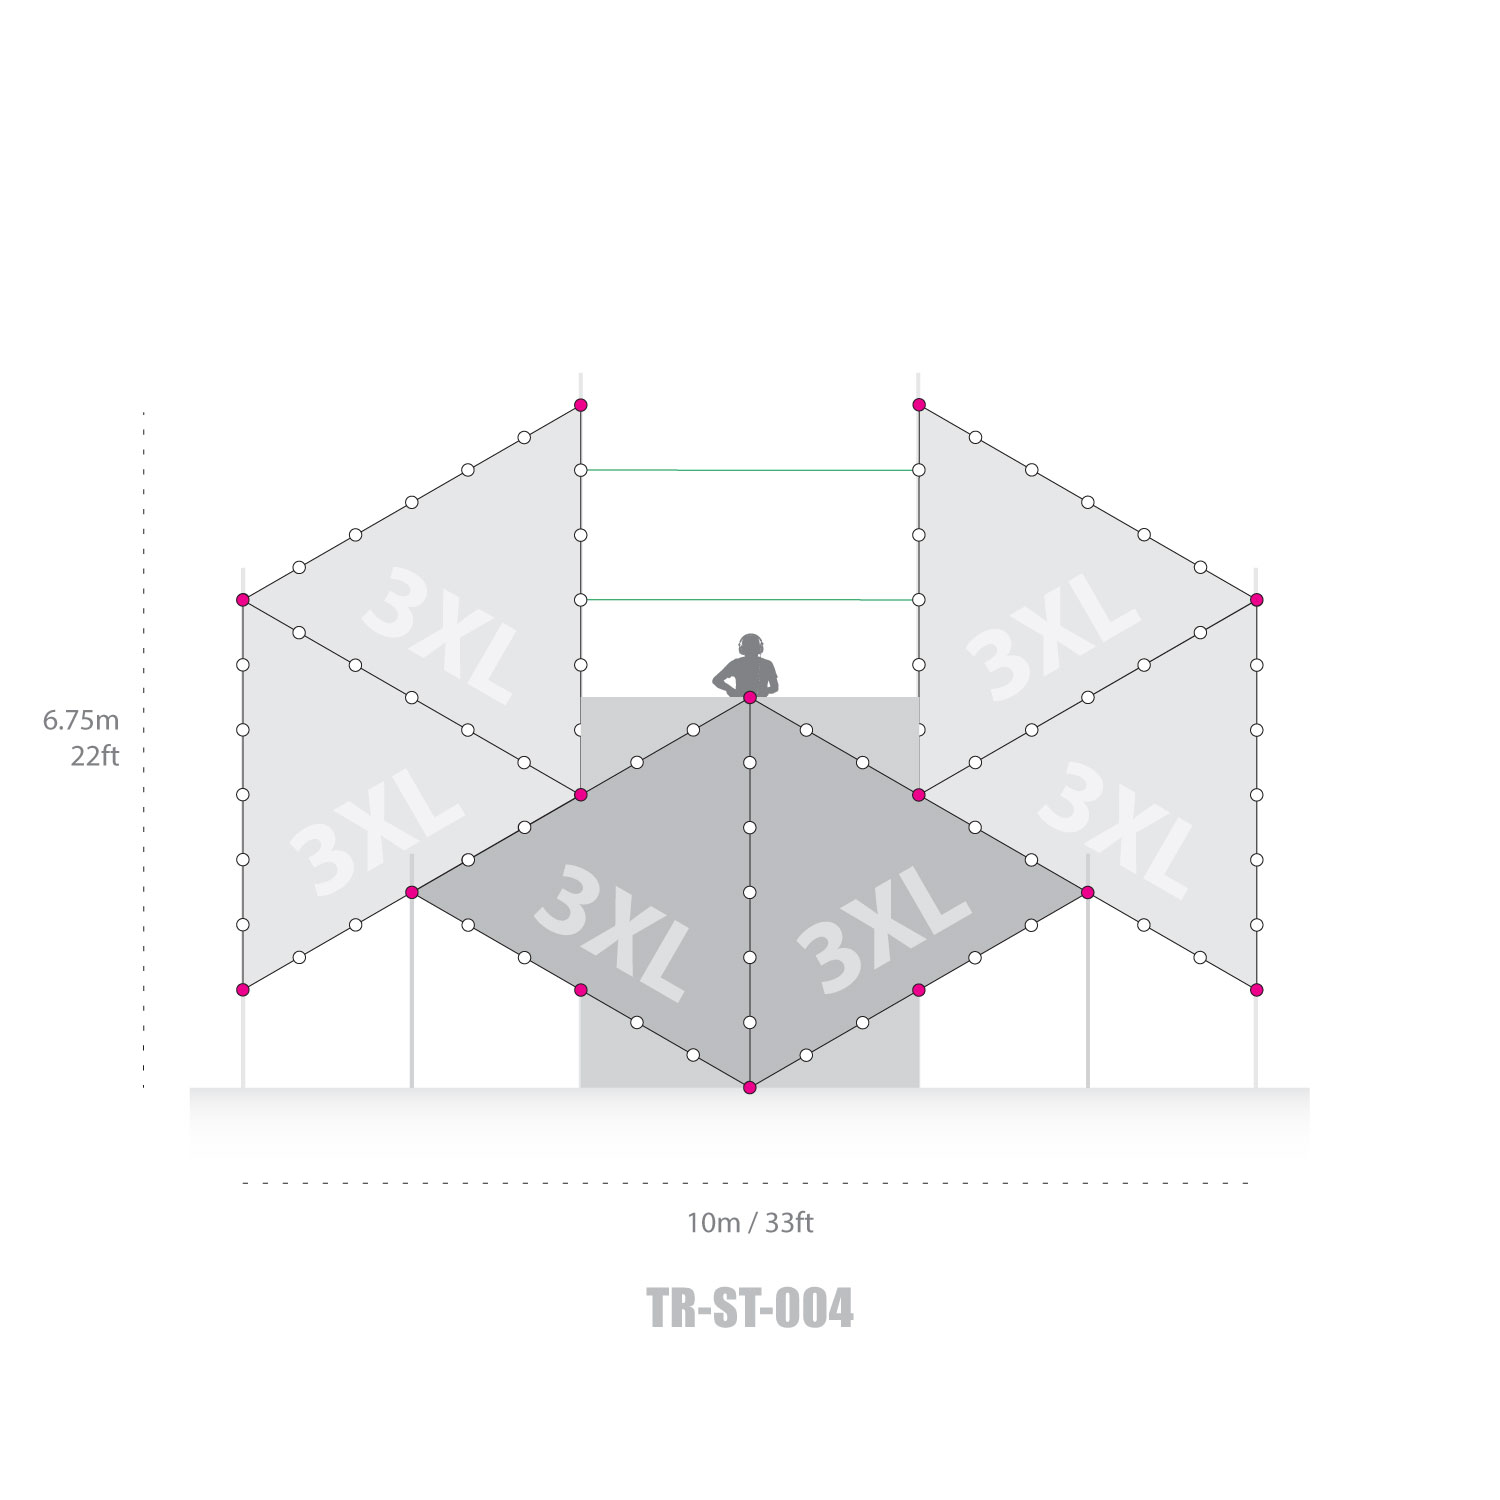
What’s happening:
- Central vertical emphasis
- DJ framed within the structure
- Layered front + back depth
Why it works:
- Adds height without adding more panels
- Creates a “centerpiece” effect
- Strong for visuals + branding
Use this if:
You want to integrate the DJ into the structure itself.
Layout 5 — Minimal front-facing stage (TR-ST-005)
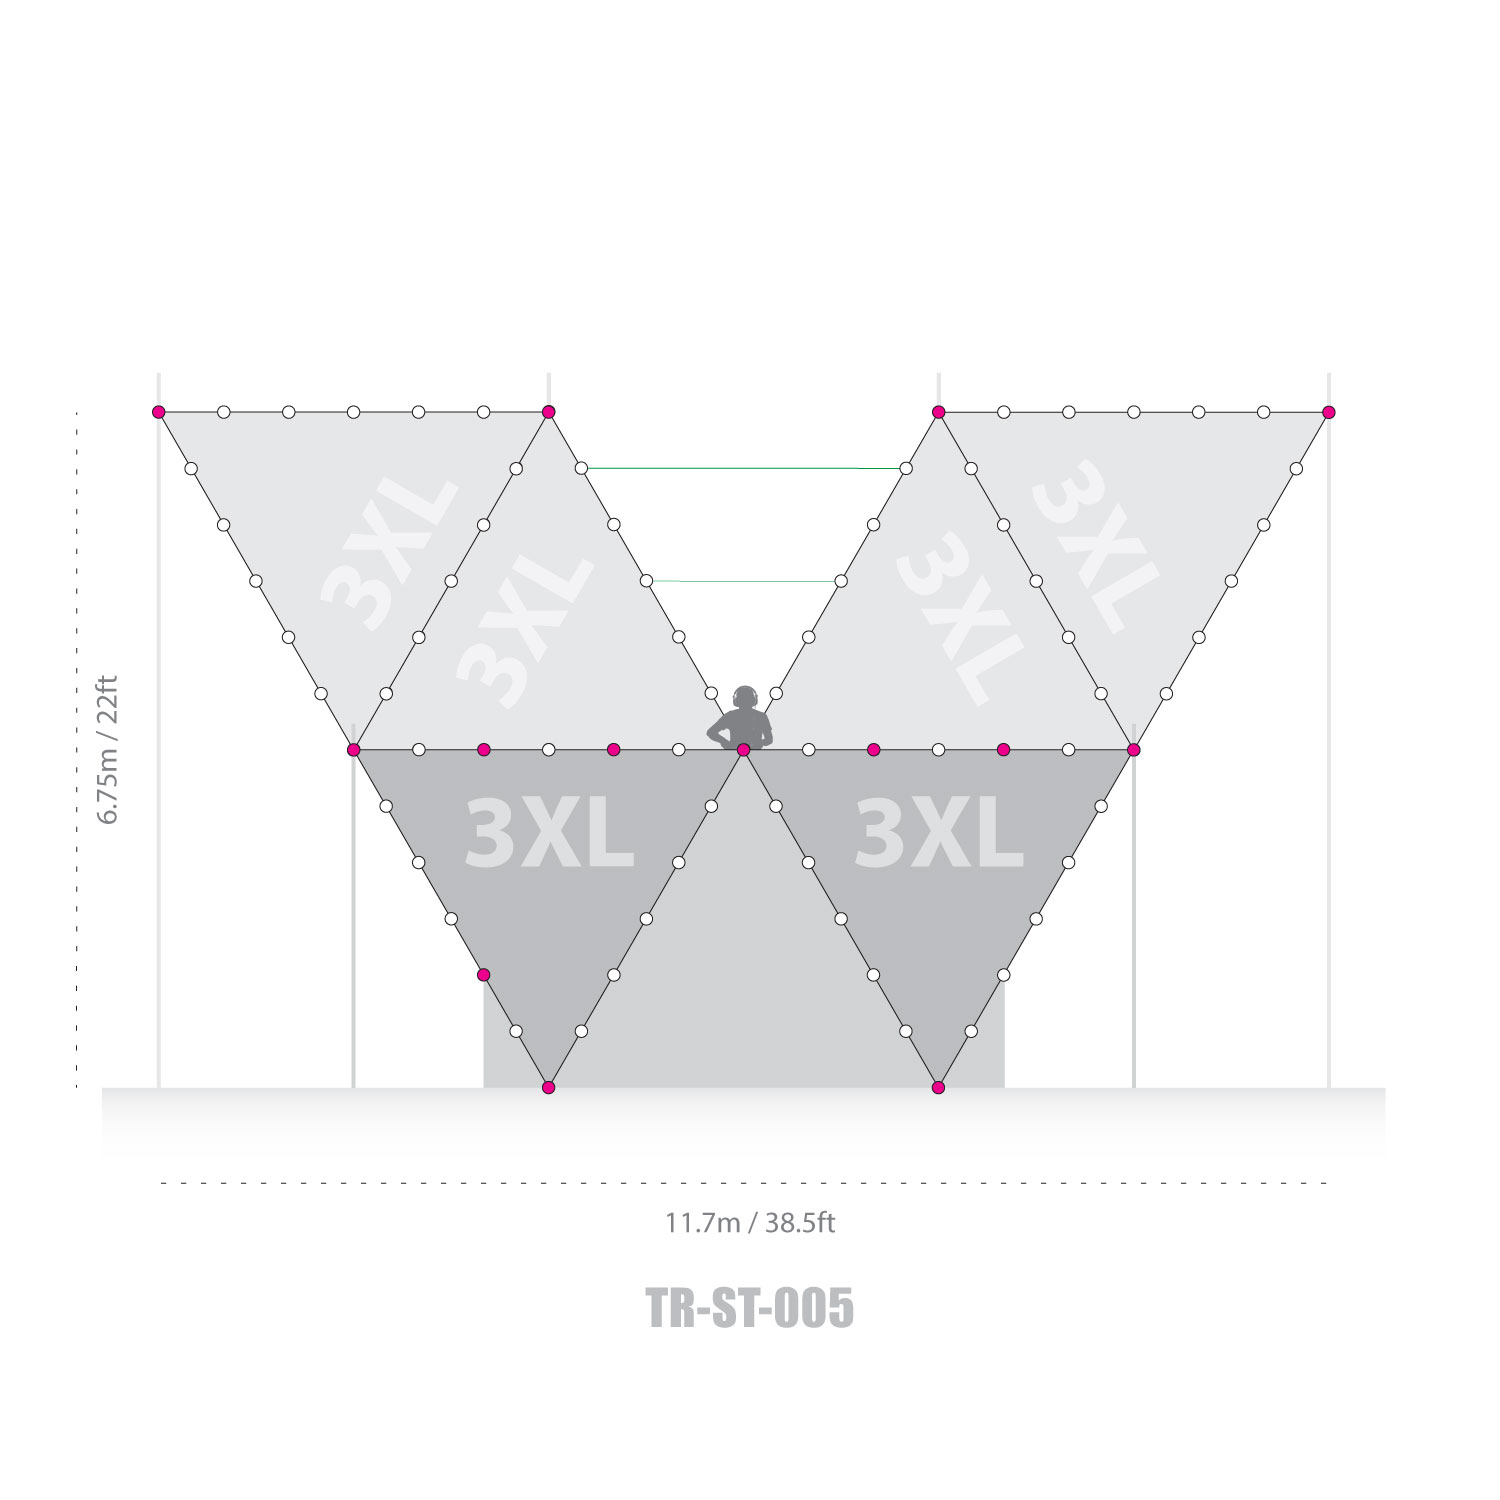
What’s happening:
- Clean, forward-facing setup
- Reduced visual complexity
- Clear front plane
Why it works:
- Quick to install
- Works in constrained environments
- Still creates depth when loops are pulled forward/back
Use this if:
You need something efficient but still impactful.
Key takeaway
All of these use the same 6 elements.
The difference is not the pieces — it’s how they’re arranged
and how you tension and position them in space.
Even small adjustments (pulling loops forward/back, lowering back panels)
can completely change how the stage feels.
If you want to build something like this
We’re currently selecting one project to produce a full stage setup using this exact system.
Final applications are being reviewed now. View the Sponsorship.
What’s next
We’re expanding this into a full layouts library — 50 configurations built around the same modular system.
If you’re already on the list, you’ll get access as we release them. If not, subscribe to get access to 200 layouts already available.