Sep
Ever though of creating and image that will melt into the canvas? Well, this tutorial can help you a lot to achieve such result! I’m going to use Adobe Illustrator, but you can use any vector graphics software.
Step 1
First you should think of the colors you are going to use. It should be a pair of complementary colors. You can try a nice free online color wheel to decide which colors to use.
Don’t forget to set “complement” color scheme:

I’m going to use purple and yellow.

Step 2
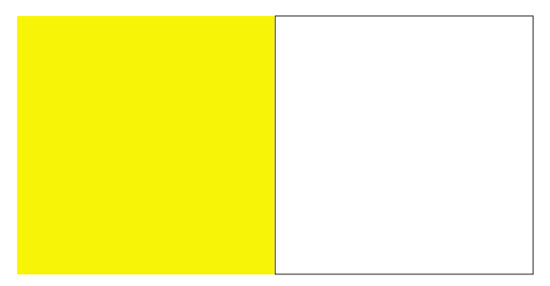
Create a new document in Adobe Illustrator 1000x1000px. Use CMYK color mode if you are going to print your design. It’s better not to change color mode ’cause this change might affect the colors. Make 2 rectangles using Rectangle Tool (M)

Step 3
Select both rectangles. Click one of the rectangles.

Open the Align Panel, set Distribute Spacing to 0 and click Horizontal Distribute Spacing.

Step 4
Remove stroke from the left rectangle and set the fill to the one of the complementary you’d like to use. It is yellow in my case. Create new swatch in the Swatch Panel and check “Global” checkbox.
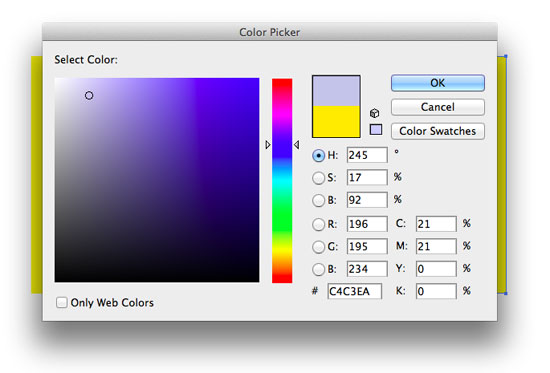
Now is the tricky part. Use Eyedropper Tool (I) to set the color of the second rectangle to the same one the first rectangle has. Double click the fill box in the Tools Panel. Move the hue slider to the complementary area and try find the color closest by brightness that fits your saturation needs. Create new swatch in the Swatch Panel and check “Global” checkbox.
Step 5
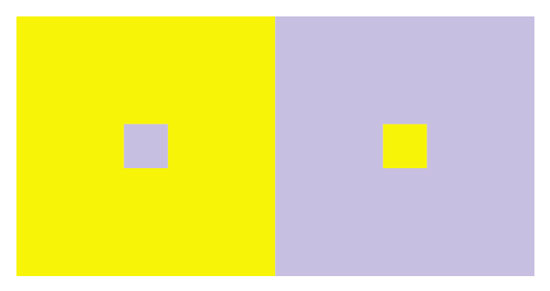
To check the vibrancy create a small rectangle over the big one and set its fill to complementary. If the contrast is not vibrant enough try to make the fill lighter or darker depending on the situation. You can also squint. If the smaller rectangle melts onto the bigger one you’ve picked the right color.
Step 6
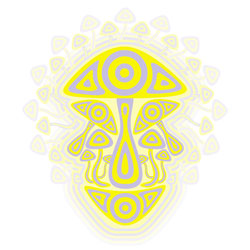
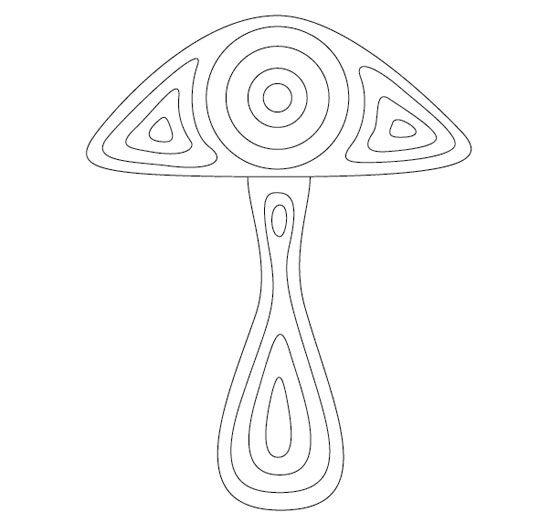
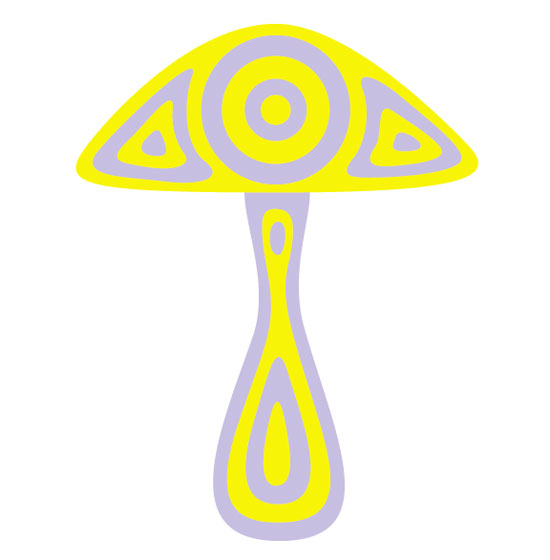
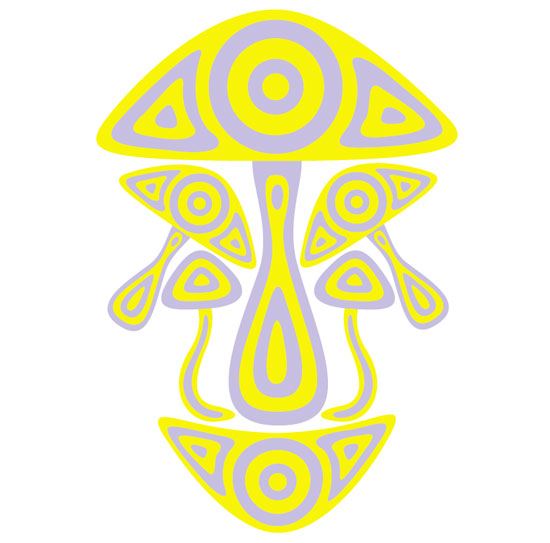
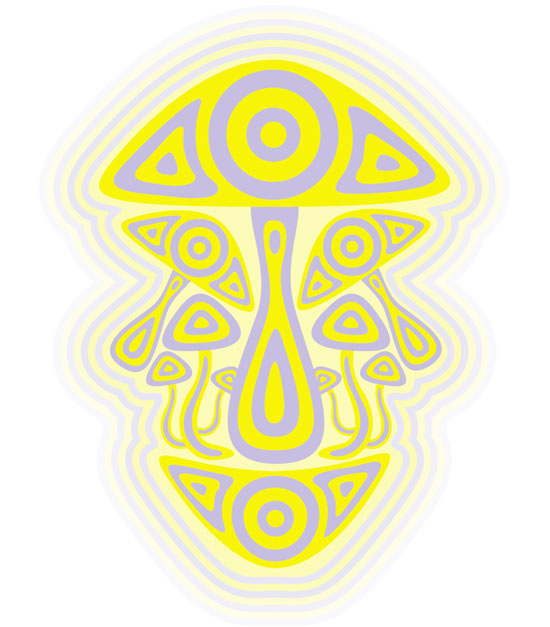
Now we are going to make a fast mushroom-face illustration. You don’t need the rectangles anymore. Just don’t forget to make the Global color swatches. I’ll draw the shrooms using Pen Tool (P). This is a relatively simple object so I’m not going to describe how I did it. What you should do is concentric shapes.
Step 7
Fill the mushroom with color like a zebra.
Step 8
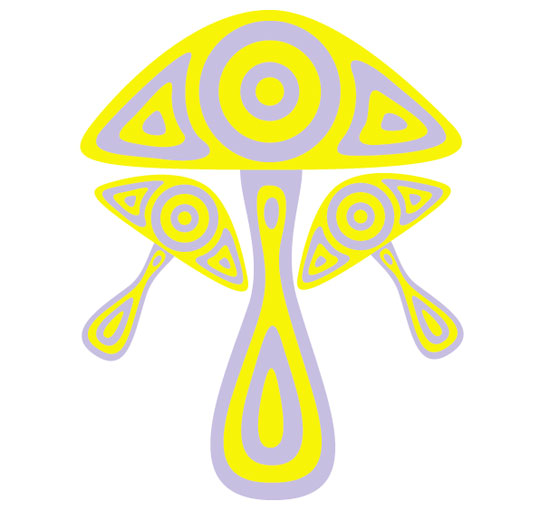
Select all (Cmd+A) and group (Cmd+G). Make 2 copies of the mushroom. Scale ’em and rotate so they’ll look like eyes.
Step 9
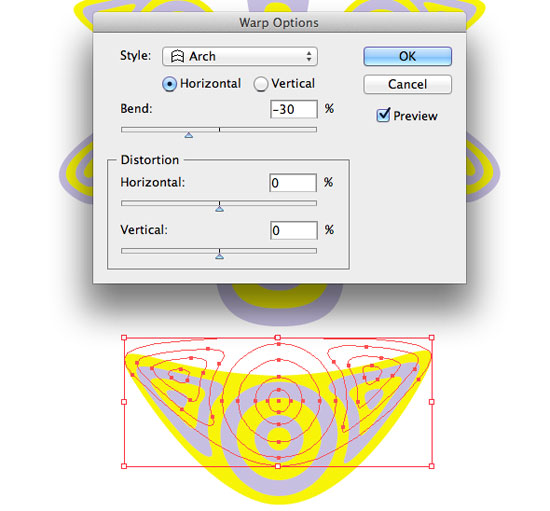
Copy the mushroom cap and rotate it 180o. Go to Effect > Warp > Arch. Set Horizontal Bend to -30%. Distortion to 0. This is going to be the mouth. With the mouth selected go to Object > Expand Appearance. Adjust the size of all elements.
Step 10
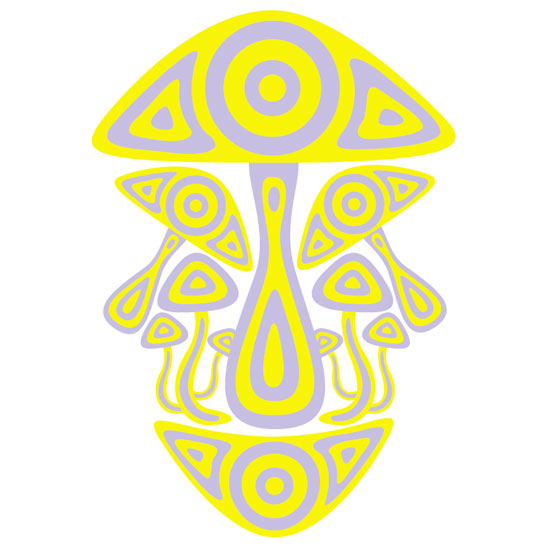
Add more mushrooms that will form the cheeks.
Step 11
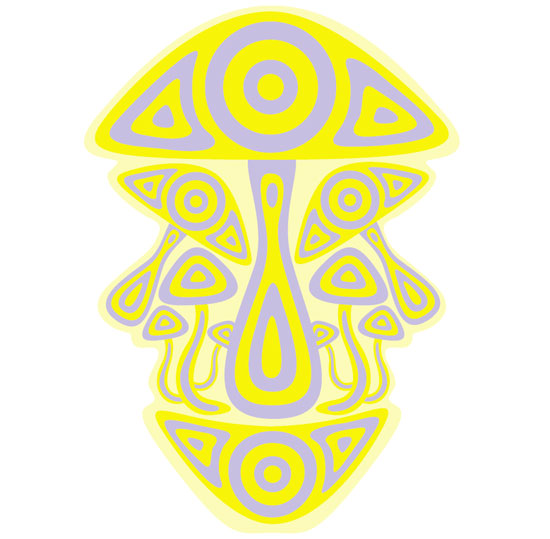
Make background shape and color it with any of two colors but set color percentage to 35-50%. Send the background shape to back (Cmd+Shift+[).
Step 12
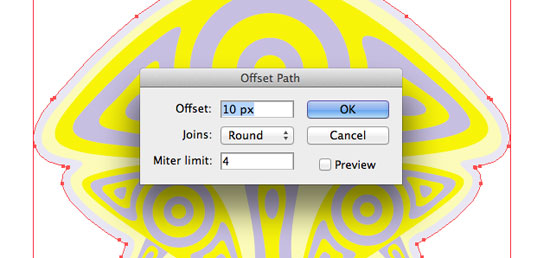
Select the background shape. Go to Object > Offset Path. Set Offset to 10px. Color the resulting shape with complementary color.
Repeat this several times. Reduce the color percentage so it will melt into white background.
Step 13
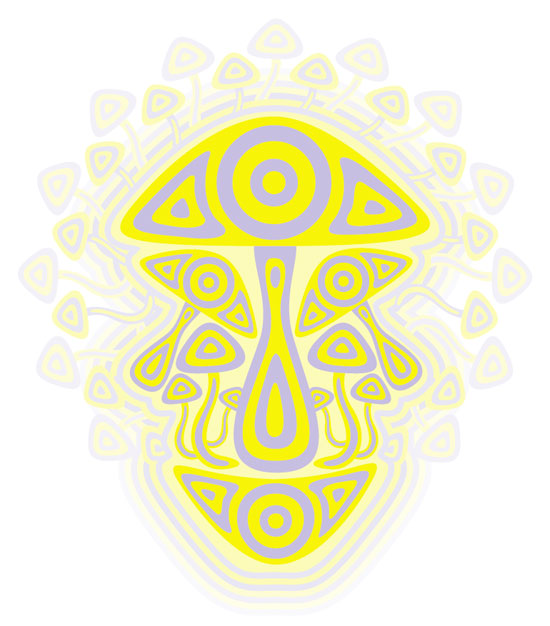
Use the technique described in tutorial “How to create concentric elements in Adobe Illustrator” to add two circles of shrooms and adjust their brightness.
To find more information about complementary colors
I’d recommend you check out Johannes Itten’s books on color theory.
Cheers!