Sep
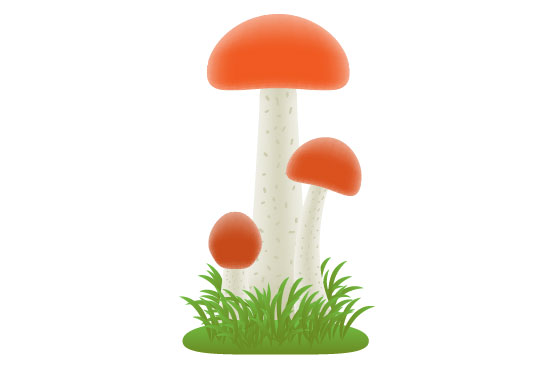
Autumn is on the run. And it is mushroom time! If you’ve never tried to draw a mushroom it’s your chance to learn how to do it in 10-30 minutes (depending on your skill). This is a 15 steps tutorial on Adobe Illustrator gradient mesh and Wrap effects. Enhoy!
Step 1
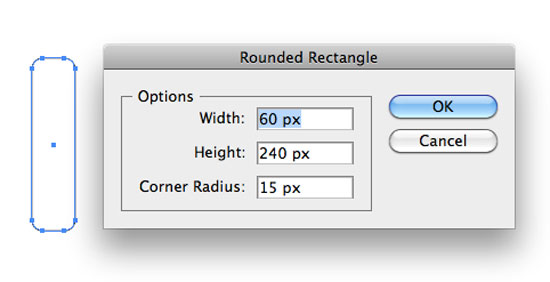
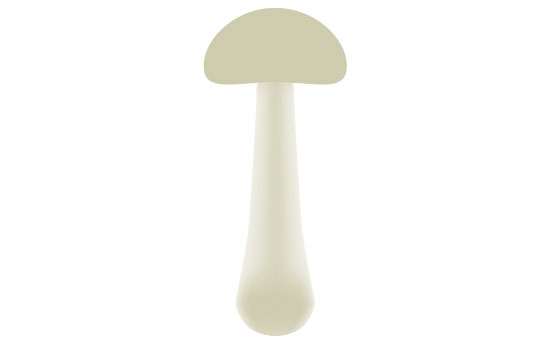
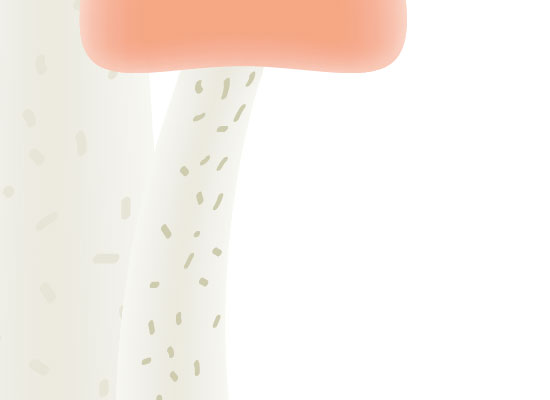
Create new document 1000x1000px. Add a rounded rectangle 60px wide, 240px high with corner radius 15px
Step 2
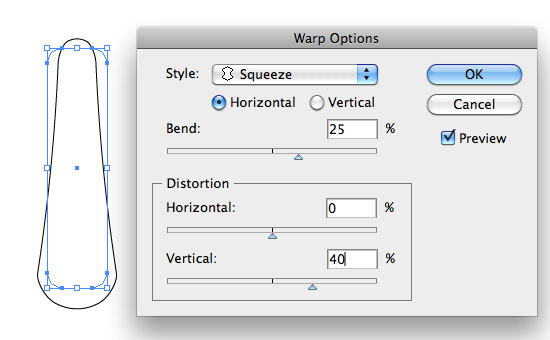
Select the rounded rectangle, go to Effects > Warp > Squeeze. Set bend to Horizontal, Bend to 25%, Distortion – Vertical = 40%
Step 3
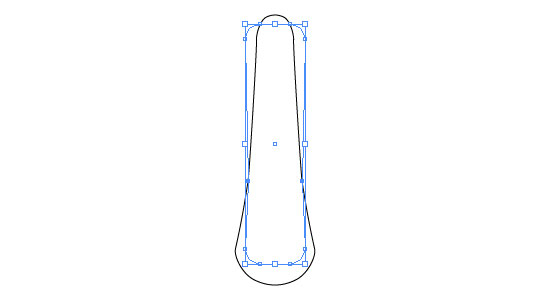
Add 2 anchor points in the lower part of rounded rectangle. Use Direct Selection Tool (A) to select both (select first, then hold Shift and select the second one). Press “E”, hold Alt and squeeze the anchor points a little.
Step 4
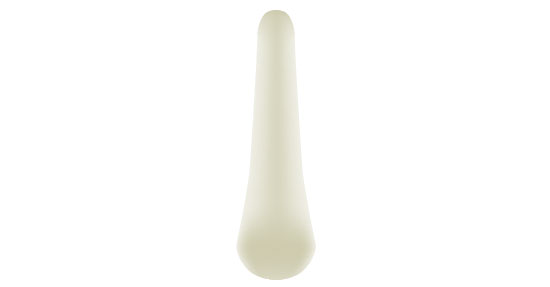
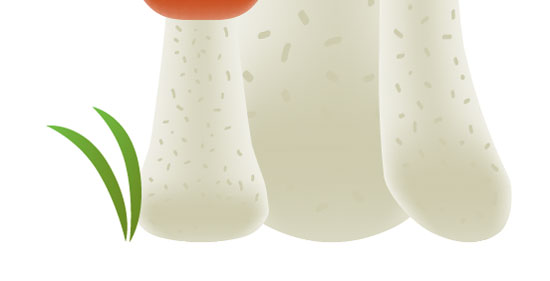
Select the rounded rectangle, go to Object > Expand Appearance. Delete the black stroke. Select the white fill. We’ll call it “stalk” now. Open the Pantone Process Coated palette clicking on the small triangle on the bottom right of the Swatches panel. Color the stalk very light brown.

Step 5
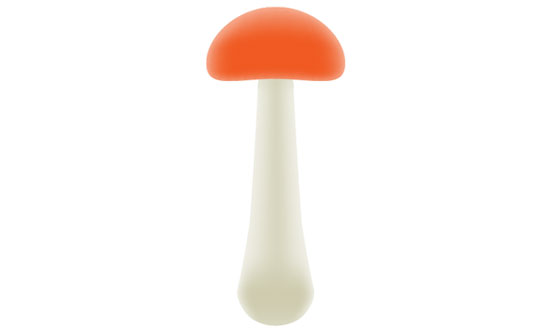
Set color percentage of the stalk to 30%. Press “U” and add some gradient mesh points.
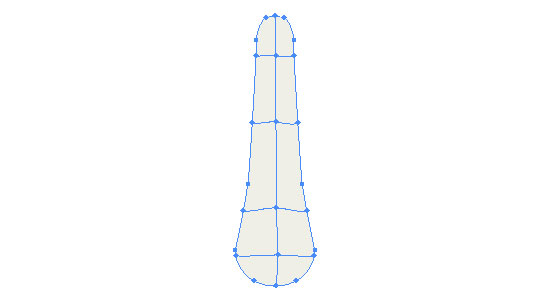
Add more gradient mesh points. Set the color percentage of the ones in the middle, top and bottom of the stalk to 100% Leave the border points bright.
Step 6
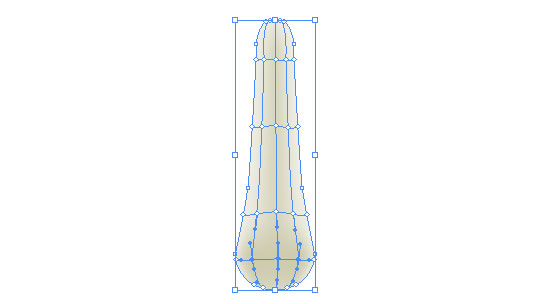
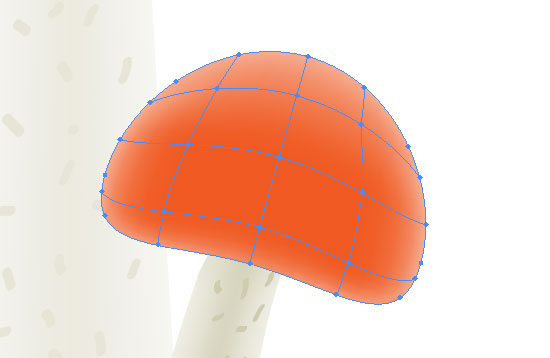
Add an ellipse (cap) using Ellipse Tool (L)
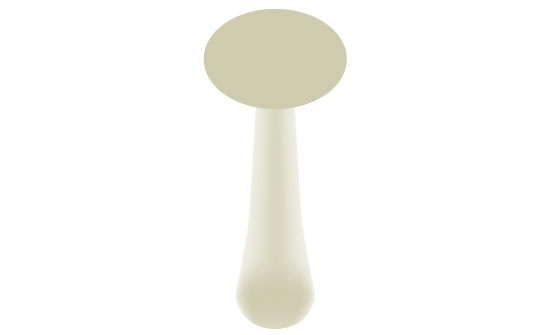
Use Direct Selection Tool (A) to select the top and bottom anchors of the cap and move them up (hold Shift while moving)
Step 7
Color the cap red and add gradient mesh points (U)

Set the percentage of the border points to 60-70% This will make the shape look round.
Step 8
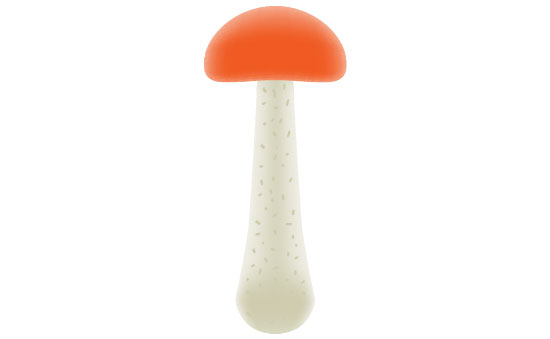
Use Brush Tool (B) with default brush to add some texture to the stalk. Use the same color as you use for the stalk (100%). Select all brush strokes with Magic Wand Tool (W), group ’em (Cmd+G), go to Object > Expand Appearance. Select all (Cmd+A) and group (Cmd+G) – this is your first mushroom.
Step 9
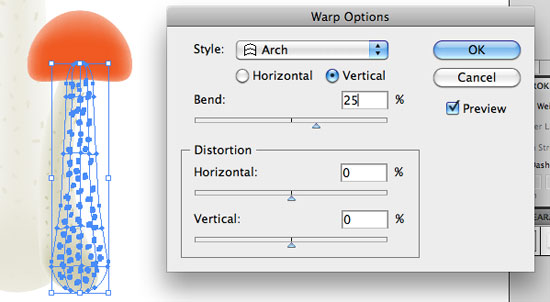
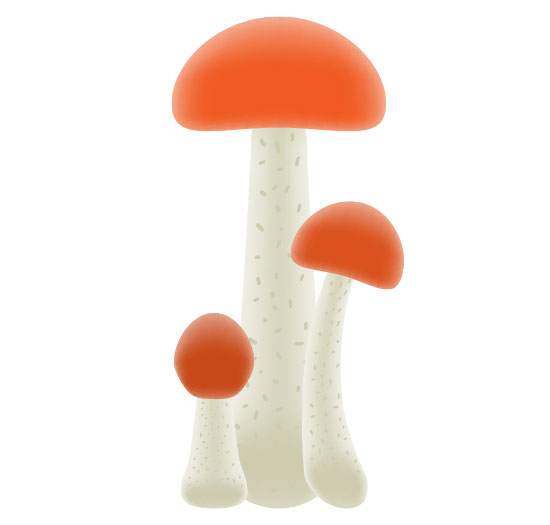
Make a copy of the mushroom and make it smaller (hold Shift while scaling to constrain proportions). Double click the smaller mushroom to enter the group. Select the texture and the stalk, go to Effects > Warp > Arch. Bend vertically 25% set Distortion to 0%. Go to Object > Expand Appearance
Double click the texture group and adjust the position of the texture parts.
Step 10
Make the cap a bit more square and adjust it’s angle. Select the cap using Selection Tool (V) and set the color to a bit darker from Pantone Process Coated palette. This will change the color of all mesh points constraining their percentage.
Step 11
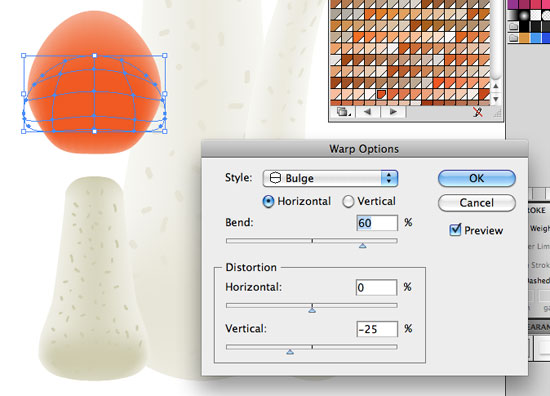
Add another mushroom copy. Make it smaller than the second shroom. Scale the stalk so it will look more boxy and adjust the position of the texture parts. Select the cap Effects > Warp > Bulge. Set the Horizontal Bend to 60% and Vertical Distortion to -25%
Step 12
Adjust the position and color of the smallest cap
Step 13
Draw a grass leaf using Pen Tool (P) and fill with Linear Gradient (from bright green to dark green).
Make lots of copies of this leaf, rotate ’em and scale to make the group look random. Leave most of the grass leaves in front and send some of them to back (Cmd+Shift+[). make 2 groups of front and back grass
Step 14
Create an ellipse using Ellipse Tool (L). Send the front line of the leaves to front (Cmd+Shift+]), green ellipse under ’em, shrooms under the ellipse and the back grass to back (well, it should be there already)
Step 15
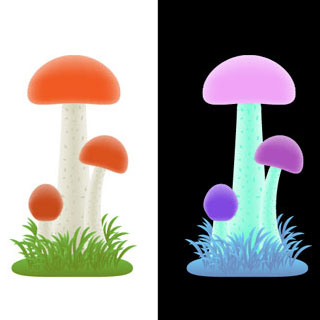
If you double click the color swatch (if you were using the ones from the Pantone Process Coated palette) you can adjust it’s color and it will affect the entire image. So you can easily make the mushrooms look more psychedelic!

If you want to support me
Check out my shop for some psychedelic goodies like fluorescent t-shirts and uv-reactive backdrops!