Sep
This tutorial is dedicated to creating concentric elements of an illustration. What do you might need them for? – They are very attractive and meditative! You can make such design just for fun or it can become a central element of you illustration. This tutorial describes the technique with help of Adobe Illustrator, but you can use any vector software ’cause the actions are very simple. My choice of free vector software is Inkscape. I’m using a mac, so if you are a PC user just replace Cmd with Ctrl.
Step 1
First you’ll need the elements that will form the circles. You can make your own or use some of my free stock. I’m going to use the ones from my last freebie – “Psychedelic face elements“.

Select the first element, Copy it (Cmd+C) and Paste in Front (Cmd+F). Move the copy down and rotate by 180o. You can hold Shift while rotating – this will make the angle of rotation equal to 45o – so you can make the precise 45o, 90o and 180o rotations.

Step 2
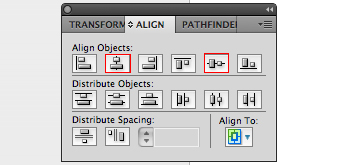
Select both elements (Cmd+A) and group ’em (Cmd+G). Open the Align Panel, set Align To: Artboard. Align the group in the middle of the artboard both vertically and horizontally.
Step 3
Select the group, Copy it (Cmd+C) and Paste in Front (Cmd+F). Rotate the copy by 90o. Select all (Cmd+A) and group it (Cmd+G).

Step 4
Select the group, Copy it (Cmd+C) and Paste in Front (Cmd+F). Rotate the copy by 45o. Select all (Cmd+A) and group it (Cmd+G).

Step 5
Select the group, Copy it (Cmd+C) and Paste in Front (Cmd+F). Rotate the copy by 22.5o. You can use Transform Panel to set the exact angle to rotate the group. Select all (Cmd+A) and group it (Cmd+G).

Step 6
If you are happy with this circle you can continue to Step 7, otherwise repeat the action from Step 5 but divide the angle by 2.

Step 7
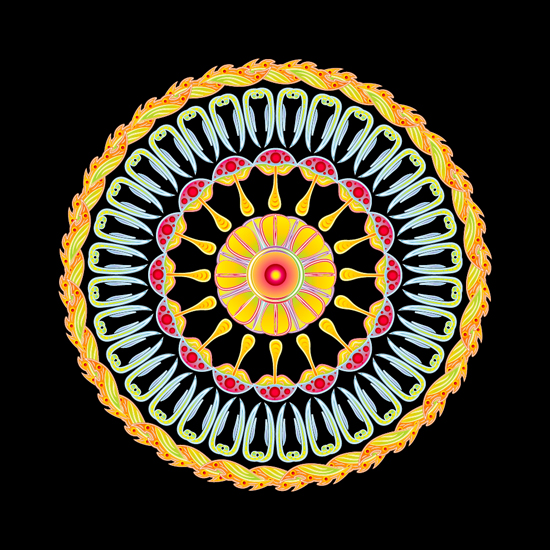
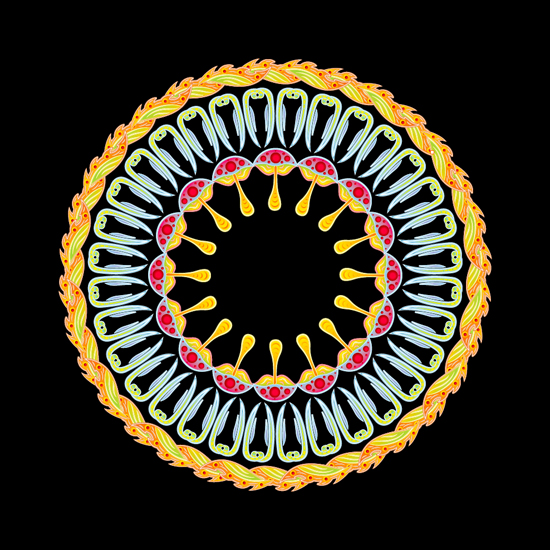
Now take a new element and make another circle inside the first one. I’m going to create 2 more inner circles and place a round element from “Psychedelic face elements” in the middle of the composition.

This is it! Next time I’ll show you some more tricks related to concentric illustrations. Subscribe to my RSS to be up to date!
Pingback: Using complementary colors to create vibrant images
Pingback: How to create a bloody Halloween ornament using Adobe Illustrator
Pingback: How to make a mandala in Adobe Illustrator