Sep
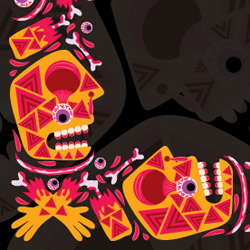
Halloween is getting closer people! So I’ve decided to make few tutorials dedicated to this wonderful holiday. Today I’ll lead you through not so hard 20 steps so finally I could create a bloody Halloween ornament yourselves. You might be wondering what so psychedelic about this ornament? Well, I tried to add some trippy Aztec to it and the coloring is more intense than traditional Halloween palette.
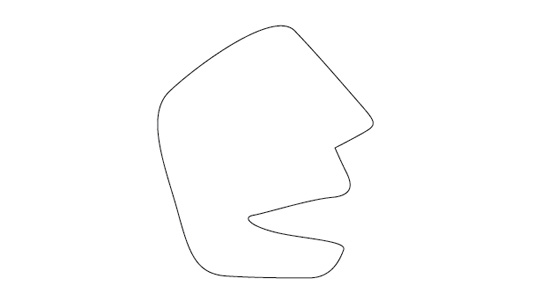
Step 1
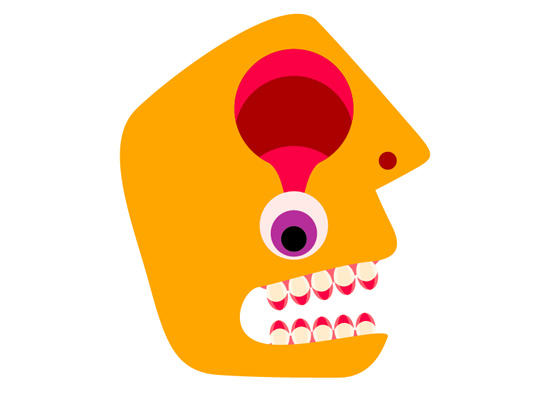
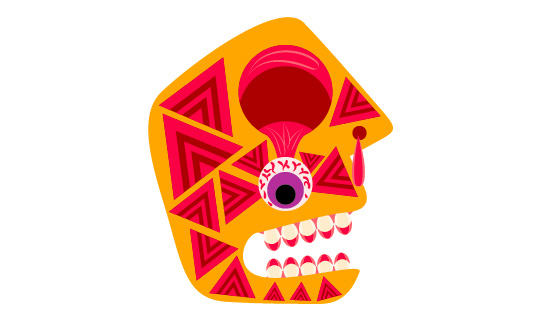
Use Pen Tool (P) to draw a face silhouette.
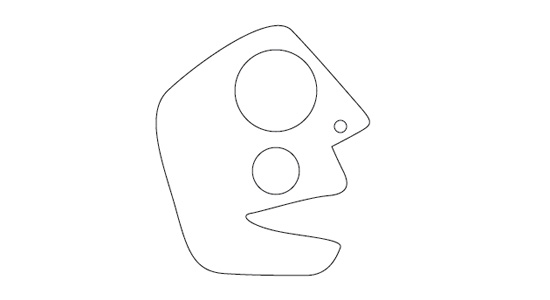
Step 2
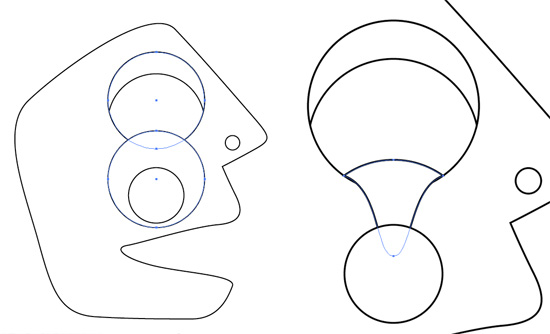
Use Ellipse Tool (L) to add eye-hole, nose-hole and a dropped out eye.
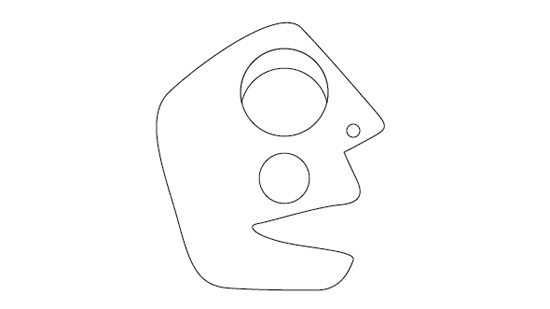
Step 3
Copy (Cmd+V) and Paste in Front (Cmd+F) the eye-hole. Select the copy, hold Alt and move it down to make another copy (hold Shift to move it vertically). Select both copies and Minus-front the second copy from the first using Pathfinder Panel.
Step 4
Copy (Cmd+V) and Paste in Front (Cmd+F) the eye-hole 2 times. Select the front copy and move it down. Intersect the eye-hole copies. Use Direct Selection Tool (A) to adjust the shape so it will look like the eye is connected to it.
Step 5
Add 2 more circles inside the eye – one for the iris and another for the pupil.
Step 6
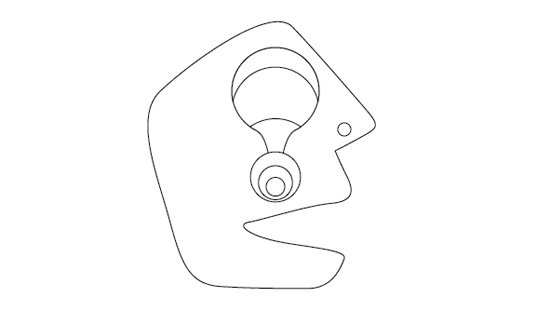
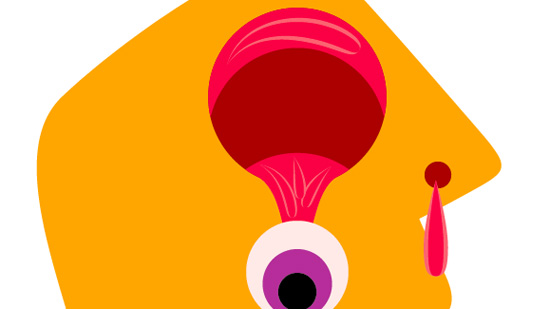
Color the head with solid colors. Use Pantone Process Coated palette with can be opened by clicking the small triangle on the top right corner of Swatches Panel (Open Swatch Library > Color Books > Pantone Process Coated) – orange for the skin, red for bleeding elements, dark red for the insides, purple for iris, black for the pupil. Color the eye with 5-10% red.

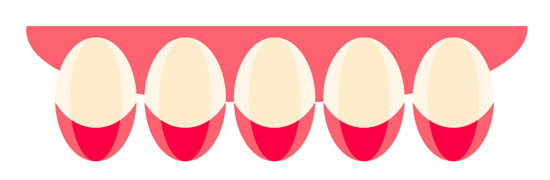
Step 7
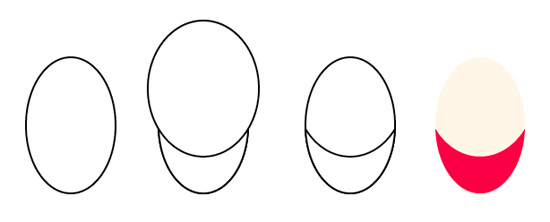
Use Ellipse Tool (L) to create the base for the tooth. Make 2 copies of it, move the second one up and minus-front it from the first. Color the remaining (blood) with red and the base with 5-10% orange.
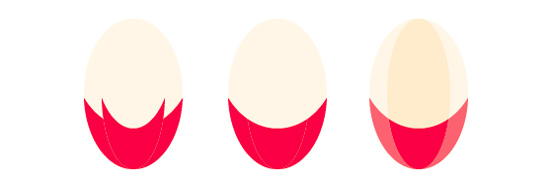
Copy both blood and base and narrow them a bit. Make a copy of the original blood and intersect it with the narrowed copy using Pathfinder Panel. Color the back blood with 70% red and the narrow base with 20% orange.
Select all tooth parts and Group ’em (Cmd+G). Make several copies. You can hold Alt and move the first tooth. Then you press Cmd+D – this will make another copy on the same distance.
Use Pen Tool (P) to draw the gums.
Step 8
Group (Cmd+G) the gum and all the teeth. Adjust the group in the jaw. Use Direct Selection Tool (A) to adjust the shape of the jaws so you could fit in another group of teeth.
Step 9
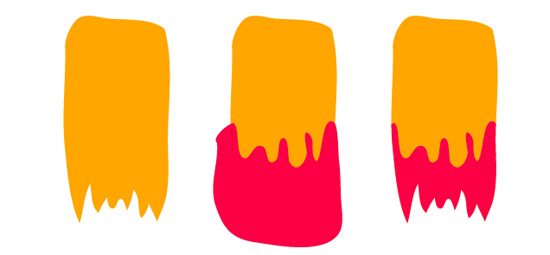
Create an ellipse using Ellipse Tool (L). Use Convert Anchor Point Tool (Shift+C) to make one of the ellipse anchors sharp. Use Direct Selection Tool (A) to adjust the position of other points. Color the resulting shape with 70% red. Make a copy and squeeze me a bit vertically. Color it with 100% red. Select both shapes, open Brushes Panel and click New Brush icon. Select Art Brush. The direction should end with the wider part of the shapes.

Step 10
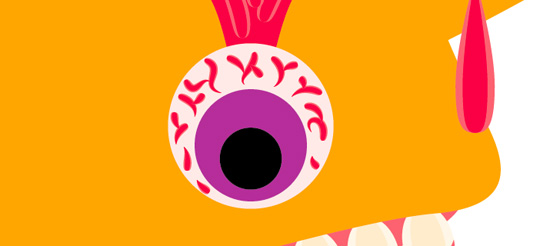
Add several blood drops using Brush Tool (B) and the new brush.
Make smaller brush strokes to create the blood vessels inside the eye.
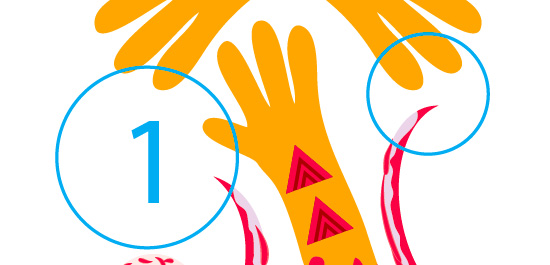
Step 11
Create a triangle using Polygon Tool (Click on the canvas and set the amount of angles to 3, the size does not matter now). Make several copies of the triangle to end up with striped triangle.

Group these triangles and make copies all over the face. Select All (Cmd+A) and Group (Cmd+G).
Step 12
Use Pencil Tool (N) to draw a part of an arm and some blood. Intersect the blood shape with the copy of the flesh shape.
Use the same technique to create another part of the arm an a bone.
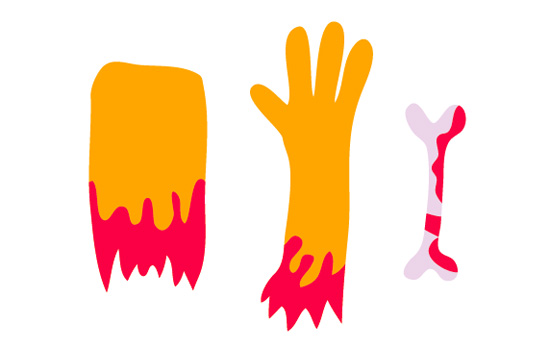
Add several triangles to the arm parts. Make the groups for each arm part. Place these parts over and under the head.

Step 13
Use the technique from Step 12 to create a rib.

Use the Brush Tool (B) with blood brush to add more blog to the rib. Use Magic Wand Tool (Y) to select all brush strokes, go to Object > Expand Appearance. Group all rib parts.

Step 14
Add few ribs to the ornament. I’ve also added one bone I’ve used for the hand parts. Add some eyes too!

Step 15
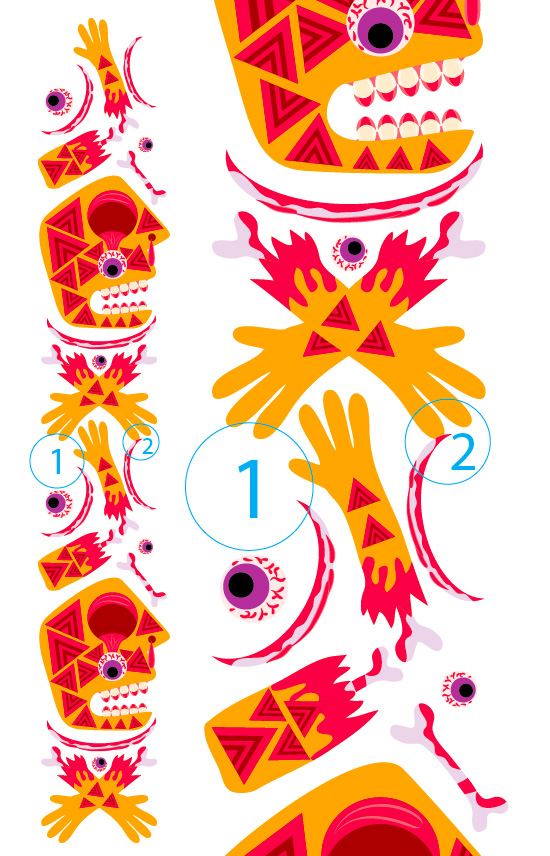
Select All (Cmd+A) and Group (Cmd+G). Make a copy of this group and move it down. If you are happy with the connection between the groups you can skip this step and go to step 18. I have some problems here:
- 1. An empty space
- 2. An overlapping
Step 16
To get rid of these problems I enter the lower group and move the rib down.
Step 17
Then I add some blood drops using the Brush Tool (B) with blood brush.

Step 18
Delete the group you did not modify and add more blood drops using the Brush Tool (B) with blood brush.
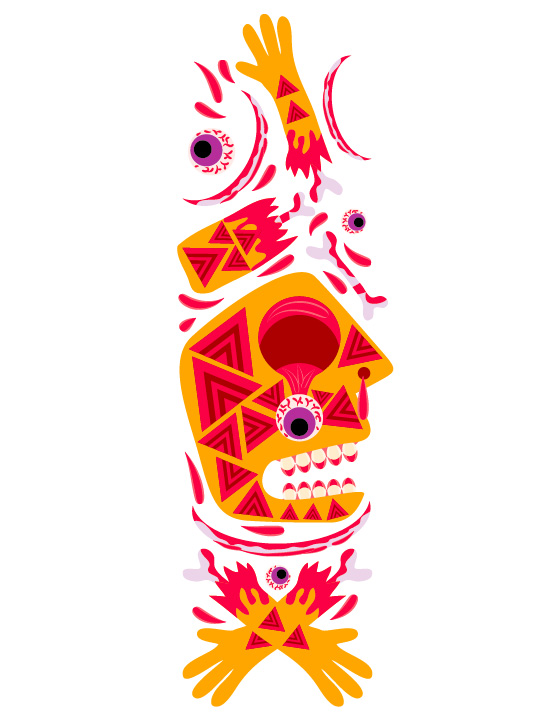
Step 19
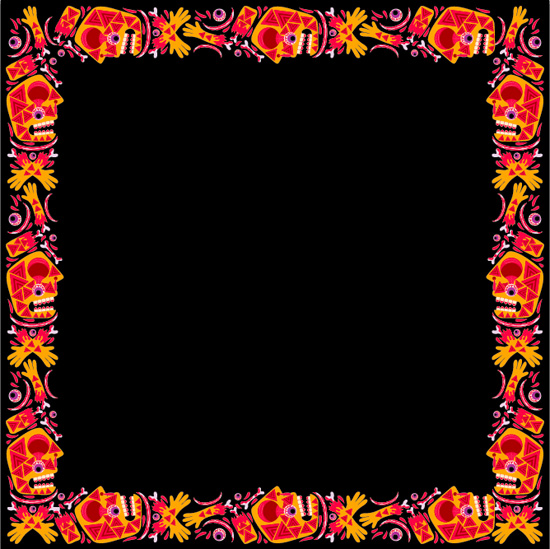
Basically this is it! You have a section that can make a cool scary Halloween ornament. You can make frames using it or modify it to create more detailed ornament or even an illustration!
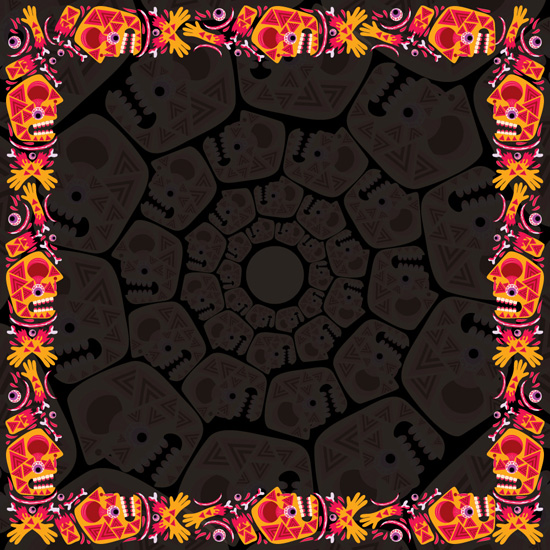
Step 20
I’ve used technique from my “How to create concentric elements in Adobe Illustrator” tutorial to add a cool depth of field effect.
Want to be up to date?
Use the form on the right-top of page to subscribe to my newsletter + you get 20% off in my Etsy Store and access to extended psychedelic art stock.
Pingback: How to create psychedelic Halloween pumpkin face using Adobe Illustrator
Its not only for recent zombi graphics also it is combination of abstract art with African style, good work
Pingback: 70+ Best Adobe Illustrator Tutorials | Pillaticos
This is how to stand out from a black backgorund